
A squeaky floor usually means two floor components are moving against each other under load. If you’re wondering how to fix squeaky floors, start by finding that movement before adding fasteners. The right repair depends on your floor covering, subfloor condition, and access from below.
Direct answer: Most floor squeaks come from movement between boards, subfloor panels, fasteners, or joists. Start by marking the exact noise, then determine whether you can reach the floor from below. Use dry graphite for board friction, shims for gaps, or screws to pull loose layers tightly together.
| How to Fix Squeaky Floors | Likely cause | Best first move |
|---|---|---|
| Noise between hardwood boards | Board-to-board friction | Work dry graphite into the seam. |
| Squeak over a joist | Loose subfloor or fastener | Refasten the subfloor. |
| Visible gap from basement | Subfloor separated from joist | Add an adhesive-coated shim. |
| Noise beneath carpet | Loose subfloor | Use a carpet squeak-repair kit. |
| Widespread bounce or sagging | Possible framing problem | Stop DIY work and inspect. |
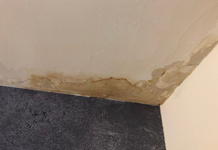
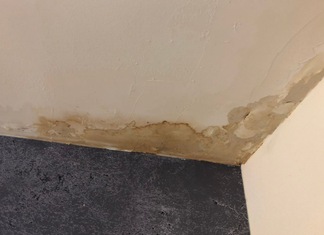
| Stains, softness, or swelling | Moisture damage | Find and repair the water source. |
Why Floors Start Squeaking
Most noises begin because wood or fasteners move slightly when someone walks across the floor. Seasonal expansion can loosen nails or increase friction between boards. Small gaps can also develop between the subfloor and floor joists over time. A single sharp squeak often points to movement in one small area. A longer creak can involve several boards or a larger subfloor section.
Floors that bounce, sag, or feel soft deserve closer inspection before any cosmetic repair. Moisture can also change the shape and strength of wood flooring components. If staining or dampness appears nearby, solve that problem before tightening the floor. RoomDome’s guide to drying out water damage explains why early moisture control matters.
What You’ll Need Before Starting
You won’t need every tool for every repair method. Choose your supplies after identifying the floor type and likely source. Avoid buying specialty screws until you know whether you’re working from above or below.
- Painter’s tape or chalk
- Flashlight
- Drill and driver bits
- Stud or joist finder
- Wood shims
- Construction adhesive
- Appropriate wood or flooring screws
- Breakaway floor-repair screws, if needed
- Powdered graphite for rubbing boards
- Matching wood filler or wax filler
- Eye protection
- A helper for locating movement
Before drilling, consider what may run beneath the floor. Plumbing lines, electrical cables, and heating components can cross framing spaces. Don’t drive long screws blindly into an area you cannot inspect.
How to Fix Squeaky Floors in 7 Steps
1. Locate the Exact Squeak
Walk slowly across the room and mark every noisy spot with painter’s tape. Step from several directions because sound can travel through wood framing. A helper can make this process much easier.
If you have basement or crawlspace access, have the helper walk above you. Watch the underside of the subfloor while the person shifts weight. Movement between a joist and subfloor often reveals the repair location quickly.
2. Identify What Is Moving
Press near the marked area and watch individual boards for movement. Noise directly along a hardwood seam may come from boards rubbing together. Vertical movement usually suggests a loose connection beneath the finished surface. Access also determines your repair choice. Working from below usually lets you preserve the finished flooring completely.
Finished ceilings, concrete slabs, and second-story rooms may require above-the-ceiling repair.
3. Lubricate Minor Hardwood Friction
Use powdered graphite when two finished wood boards rub at their edges. Work a small amount into the noisy seam using a soft brush. Then walk across the area several times to distribute it. This method reduces friction but does not tighten a loose subfloor. Treat it as a targeted fix for surface movement.
Persistent noise after lubrication usually means the problem sits deeper in the floor assembly. Avoid oily household sprays on finished wood. They can leave residue, attract dirt, or affect some finishes. A dry lubricant is easier to control and clean.
4. Shim a Gap From Below
Inspect the marked location from the basement or crawlspace. Look for a narrow space where the subfloor lifts slightly from a joist. Have your helper step on the area to confirm the movement. Coat a thin wood shim with construction adhesive before inserting it. Push the shim in only until it’s snug. Forcing it too far can raise the floor and create a new problem.
Let the adhesive cure according to its instructions before testing the repair aggressively. The goal is to stop movement without changing the floor height. This approach works well when the joist remains sound and straight.
5. Refasten a Loose Subfloor From Below
A loose subfloor may need more than a shim. The repair involves pulling the moving layers tightly together with correctly sized screws. Measure the floor assembly carefully before choosing screw length. Have your helper stand over the squeaky location while you work below. Their weight helps close the gap as you fasten. Drive only where you understand the flooring thickness and hidden utilities.
Never use an unnecessarily long fastener. A screw that reaches through finished flooring creates a harder repair than the original noise. Stop if you cannot confidently determine safe screw depth.
6. Repair the Floor From Above
When underside access is impossible, specialty breakaway screws can secure loose flooring from the room. These systems use a depth guide and a screw designed to snap below the surface. Follow the manufacturer’s directions for your specific flooring material. On finished hardwood, you can fill a small remaining hole with matching wax or wood filler.
Test filler color in an inconspicuous area first. Careful placement keeps the repair difficult to notice. Carpeted areas require a system made for use through carpet. The repair fastens the subfloor while hiding the broken screw head beneath the pile. This Old House demonstrates the same general technique for carpeted floor repairs.
7. Retest the Area and Watch for Warning Signs
Walk across the repaired section from several directions after the repair settles. Listen for nearby noises that the first squeak may have masked. Fix each source separately instead of adding fasteners across the whole room. Stop DIY work if the floor feels soft, unusually springy, or visibly uneven. Water stains, rot, cracked framing, or widespread movement can indicate a larger problem.
Lowe’s also recommends professional evaluation for sagging, water damage, and widespread squeaking. If moisture caused the damage, fixing noise alone won’t solve the underlying problem. RoomDome’s guide to mold remediation after water damage covers issues that may follow persistent dampness. Basement owners may also benefit from reviewing current sump pump installation costs and options.
Which Repair Method Fits Your Floor?
Hardwood needs the most careful surface work because every hole remains visible. Start with dry lubrication when boards rub together. Move to a concealed fastening method only if surface friction isn’t the cause. Carpet often hides the repair but makes locating joists harder. A purpose-built repair kit can fasten the subfloor without removing the entire carpet. Pulling the carpet back is another option when an edge is already accessible.
Laminate and floating floors require extra caution because many systems are designed to move slightly. Driving fasteners through a floating surface can interfere with its installation method. Check the flooring manufacturer’s instructions before drilling through these materials.
Mistakes That Can Make Floor Noise Worse
Guessing the squeak’s location leads to unnecessary holes and missed framing. Mark the problem first and confirm movement before reaching for the drill. A few minutes of diagnosis can prevent permanent surface damage. Another mistake is hammering a shim deeply into a joist gap. The shim should fill movement, not lift the subfloor. Stop tapping once the gap becomes stable.
Don’t treat moisture-related movement as a fastener problem. Swollen boards, stains, and soft subflooring need a moisture investigation first. RoomDome’s broader home improvement ideas guide also emphasizes addressing practical flooring needs before cosmetic upgrades.
When Should You Call a Professional?

Call a flooring professional or carpenter when squeaking covers a large area. The same advice applies when the floor bounces or slopes noticeably. Those symptoms may involve joists, subfloor damage, or installation problems beyond a simple fastener repair. Professional help also makes sense around valuable hardwood, complex floor systems, or hidden plumbing.
A contractor can investigate without drilling multiple test holes. That can be cheaper than repairing a damaged finished floor afterward. New noise after a leak deserves special attention. Moisture can swell flooring, weaken subfloor panels, or expose existing gaps. Fix the leak and assess damaged materials before trying to silence the floor.
How to Prevent Future Floor Squeaks
Keep water leaks from reaching flooring and framing materials. Repair plumbing, roof, or basement moisture problems as soon as you find them. Stable conditions reduce unnecessary movement in wood components. During renovations, insist on a flat, dry, properly fastened subfloor before installing new flooring. Correct installation prevents many noises from developing later.
RoomDome’s other room-planning and home-upgrade ideas can help you sequence practical work before decorative changes. Pay attention when a quiet floor suddenly becomes noisy. One isolated seasonal sound may be minor, but spreading movement deserves investigation. Early diagnosis keeps a small fastening problem from becoming a larger repair.
Your Next Step
Start by marking one noisy area and deciding whether you can inspect it from below. Diagnose the moving connection before buying hardware or drilling holes. If the floor also sags, feels soft, or shows moisture damage, get professional help before fastening anything.
Frequently Asked Questions
Can You Fix a Squeaky Floor Without Removing Hardwood?
Yes, you can complete many repairs from below or with small, concealed fasteners from above. Learning how to fix squeaky floors starts with identifying which layer moves. Avoid drilling through finished wood until you’ve ruled out simpler causes.
Can You Fix a Squeaky Floor Through Carpet?
Yes, specialty repair systems are designed to work through carpet. They use breakaway fasteners that secure the subfloor and leave the hardware below the visible pile. Accurate joist location remains essential before drilling.
Why Does My Floor Squeak More During Certain Seasons?
Wood changes dimensions as indoor moisture conditions change through the year. That movement can increase rubbing between boards or around loosened fasteners. Seasonal noise alone does not prove that the framing is damaged.
Are Squeaky Floors Dangerous?
Most isolated squeaks come from movement rather than structural failure. Concern increases when noise appears with sagging, bouncing, softness, water damage, or cracked framing. Those signs justify professional inspection instead of repeated DIY fastening.
Should I Use Nails or Screws?
Screws generally resist withdrawal better when tightening a loose subfloor connection. The right type and length depend on the floor assembly and the direction of repair. Specialty breakaway screws are useful when the finished surface must stay largely intact.