
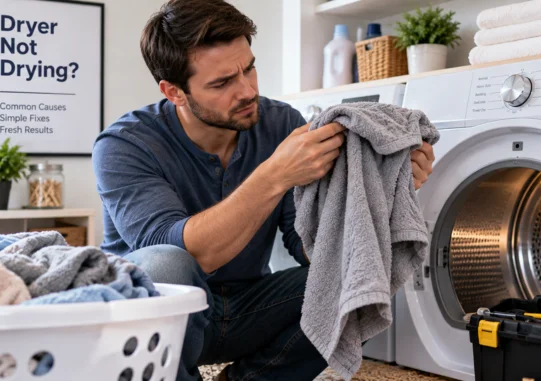
A dryer not drying clothes usually has an airflow, load, setting, power, or heating problem. Most failures come from restricted airflow or a simple setup issue, not a dead appliance. Start with the easy checks below before you open panels or buy replacement parts.
| Symptom | Most likely area | First check |
|---|---|---|
| Clothes are warm but damp. | Restricted airflow | Clean the lint screen and inspect the exhaust path. |
| Clothes are cold and damp. | No heat or power issue | Check the cycle, breaker, or gas supply. |
| The cycle stops too early. | Sensor or automatic-cycle issue | Clean sensors and test a timed cycle. |
| Two cycles are needed. | Vent, load, or washer-spin issue | Check airflow, load size, and final spin. |
| Only heavy items stay damp. | Mixed fabrics or oversized load | Separate towels, jeans, and bulky items |
Start with airflow if a dryer leaves clothes warm or slightly damp. Clean the lint screen, inspect the exhaust hose, and confirm strong airflow at the outdoor hood. If clothes stay cold, check the cycle, home power, or gas supply, then arrange service for internal components.
Key Takeaways
- Warm and damp usually means you should check airflow first.
- Cold and damp usually means you should check heat, power, or gas.
- A packed drum and a weak washer spin can create long dry times.
- Stop using the appliance if you smell burning, smell gas, notice scorching, or have repeated breaker trips.
Why Is Your Dryer Not Drying?
Drying depends on heat, airflow, and tumbling time. A problem in any one area can leave fabrics wet after a full cycle. The symptoms you notice after the cycle help narrow the cause. Warm, damp loads usually point to restricted airflow or an oversized load. Cold, damp loads point more toward settings, power, gas supply, or heating parts. Early stopping can involve moisture sensors or automatic-cycle behavior.
What You’ll Need
Most checks require no disassembly. Keep basic cleaning tools nearby, and unplug the machine before moving it from the wall. Do not pull a gas model far enough to strain its supply line.
- Flashlight
- Vacuum with a hose attachment
- Soft brush and mild dish soap
- Owner’s manual or model number
- A helper if the machine must be moved
How to Fix the Problem in 9 Steps
Work in this order so you start with the safest, most likely causes. Stop when performance returns to normal. Use the owner’s manual whenever your model has different access or cleaning instructions, and keep the filter and vent routines in RoomDome’s home system maintenance guide in mind as you work through them.
- Clean the lint screen. Remove all lint before the next load. Wash a coated screen with warm water, mild dish soap, and a soft brush.
- Reduce the load size. Split a packed load so clothing can tumble freely. Oversized loads take longer because hot air needs room to circulate. ENERGY STAR confirms that oversized loads can increase drying time.
- Confirm the cycle and heat setting. Choose a heated timed cycle for troubleshooting. Air-only, delicate, eco, or low-heat programs can extend drying time by design.
- Check the washer’s final spin. If clothes enter soaking wet, the washer may be leaving too much water behind. Run a stronger spin cycle and test a normal load.
- Inspect the vent hose. Unplug the unit first. Straighten crushed or kinked sections, and replace damaged ducting with manufacturer-approved vent material.
- Check the exterior exhaust hood. Reconnect power, start a heated cycle, and look at the exterior hood. The flap should open freely with a noticeable stream of air.
- Clean the full vent path. If airflow is weak, clean the duct from the appliance to the exterior outlet. Hire a vent-cleaning professional when the run is long, hidden, or hard to access.
- Clean the moisture sensor bars. Wipe accessible sensor bars as the owner’s manual directs. Residue can make some automatic cycles stop before thicker fabrics are dry.
- Compare warm versus cold results. Run a small normal load after reassembly. Warm but damp points back to airflow, while cold and damp points toward a no-heat problem.
Ventless heat pump and condenser models need a different check. They do not use the same exterior exhaust path as conventional vented models. Check the condenser, filters, drain, or water tank as the manual directs.
When Clothes Are Hot but Still Damp
Heat without dry clothes often means moisture cannot leave efficiently. Recheck the lint screen, duct, exterior hood, and load size before blaming heating parts. A hot laundry room or weak outdoor exhaust also supports an airflow problem. Treat restricted airflow as a safety issue, not only a performance issue. U.S. Fire Administration data says failure to clean led to 31% of home clothes-dryer fires from 2018 to 2020. Keep the lint screen and exhaust path clear, and stop using the unit if it overheats.
When the Drum Turns but There Is No Heat
U.S. electric models commonly use a 240-volt supply. One side of a two-pole breaker can trip while the motor still turns. Reset both linked breaker poles once, then call an electrician if the breaker trips again. A gas model can also tumble without producing heat. Confirm the shutoff valve is open only if you can access it safely. If you smell gas, do not troubleshoot further; follow your utility’s emergency guidance.
If power and settings are correct, internal parts may need testing. Possible faults include a heating element, thermal fuse, igniter, gas-valve coils, thermostat, thermistor, or control. Because diagnosis requires live power or cabinet access, professional service is the safer next step.
When to Stop DIY and Call a Professional
Stop immediately if you smell burning, see visible scorching, have repeated breaker trips, smell gas, or notice extreme cabinet heat. Also stop if the vent path is clear, but airflow stays weak. Those signs can indicate internal electrical, combustion, blower, or safety-device problems. Do not bypass a thermal fuse or other protective device.
Do not test live voltage unless you are trained for that work. A qualified appliance technician or electrician can isolate the failed circuit without adding risk. Regular upkeep can prevent many repeat problems. Cleaning appliance filters and vents as part of routine care keeps small restrictions from turning into service calls. That habit also makes changes in drying time easier to notice early.
How to Prevent Long Drying Times
Good habits protect both performance and safety. Clean lint after every load, and inspect the exhaust system whenever drying time starts increasing. ENERGY STAR also recommends scrubbing residue from the lint filter if you use dryer sheets.
- Keep loads moderate, and separate bulky towels from lighter clothing.
- Use a stronger washer spin when fabrics leave the washer unusually wet.
- Keep the exhaust hose short, smooth, and free from crushing.
- Check that the outside hood opens while the machine runs.
- Follow the manual for sensor, condenser, filter, and drain cleaning.
Your home’s electrical system matters too. Check for repeated breaker problems rather than resetting them over and over. RoomDome’s electrical safety guide explains why proper circuit design and professional inspection matter for major appliances.
Your Next Step
Start with the lint screen and airflow path, then test one normal-sized load. If heat is missing or safety symptoms appear, schedule qualified service instead of opening the cabinet. For more home-care topics, browse RoomDome’s home appliance guides.
FAQ
Why is my dryer not drying but getting hot?
The most likely issue is restricted airflow, an oversized load, or a sensor problem. Start with the lint screen, vent hose, and exterior hood. If airflow is strong, reduce the load and clean accessible moisture sensors as your manual allows.
Why does my machine take two cycles to dry clothes?
Two cycles usually means the first cycle is not removing moisture fast enough. A restricted vent, overloaded drum, weak washer spin, or low-heat setting can cause that pattern. Fix the airflow and load issue before extending cycle time.
Can a clogged vent stop clothes from drying?
Yes. A blockage traps warm, moist air instead of exhausting it outside. It can lengthen drying time, raise cabinet temperature, and increase fire risk.
Should I replace the appliance if it stops drying?
Not immediately. Lint buildup, settings, a tripped breaker, and poor load size are cheaper problems to rule out first. Replacement makes more sense after diagnosis shows costly failures or repeated repairs on an older unit.